Contacts
For your operation to maintain an efficient and personalized relationship, the Omni platform centralizes customer management in the Contacts module. This environment stores customer identification data and exclusive distribution rules (such as carteirização). A sanitized and well-structured contact base is the first step toward the success of your active and receptive approaches.
Understanding the "My Contacts" Screen
Before starting the registration and import processes, it is essential to understand the layout of the elements on the main interface. When accessing the menu, you will see the centralized management panel.

Search and Segmentation Filters
The platform provides an advanced search engine so you can locate records or segment your base in real time through the following filters:
- a. Search by contact: Free text field to perform a direct and immediate search for a contact by their name.
- b. Active / Inactive: Selector filter to display only the contacts that are active or inactive within the organization.
- c. Without Owner / With Owner: Strategic filter to segment contacts that are linked to an exclusive portfolio (com proprietário) or without carteirização (sem proprietário).
- d. Owners: Dynamic filter to bring specific users who have signed portfolios. This field will only be active for selection when the "With Owner" filter is selected.
- e. Portfolio type: Displays the list of existing portfolio flows.

Action Buttons
When selecting one or more contacts from the list, Omni will enable the tool menu for executing batch administrative routines:
- a. Select: Global checkbox that automatically marks all contacts visible on the current screen.
- b. Activate: Changes the status of the selected contacts to "Active".
- c. Deactivate: Changes the status of the selected contacts to "Inactive".
- d. Assign: Operational shortcut to link a carteirização flow and a responsible agent to the marked contacts.
- e. Anonymize: Executes the security protocol to completely and irreversibly encrypt the data of the selected contact.

Viewing Modes
To match the operator’s or supervisor’s preference, the record listing can be switched between two visual formats:
- a. List: Displays contacts structured in a traditional table format, ideal for viewing large volumes of data.
- b. Cards: Shows contacts in a card layout, making it easier to quickly identify details. To activate this mode, simply click the Show Details button.

Contact Management
Contacts in the Omni platform can be added in two main ways: individually, through direct registration in the interface, or in batch, by importing CSV files. Regardless of the chosen method, the only strictly mandatory field for creating a record is the contact’s Name.
Individual Registration
Individual registration is the ideal alternative for quick and occasional insertions in the operation’s routine. To start this process, the user must click the New Contact button, located at the top right corner of the management screen.
Access to Registration Types
When opening the form, the operator will have access to an interface organized into structured blocks to qualify the customer’s profile:
- 🖼️ Image/Avatar: Allows uploading a profile photo for quick visual identification of the customer during the service journey.
- 👤 Personal Information: Centralizes the fundamental data of the contact, including essential fields such as Name, Email, CPF, Gender, Date of Birth, and External ID.
- 📍 Address Information: Block dedicated to the customer’s geographic location, allowing the completion of ZIP Code, Address, Number, Complement, City, State, and Country.
- 🌐 Social Networks: Enables mapping and registering the customer’s digital contact channels, including Instagram, Facebook, Twitter, and WhatsApp.
- ⚙️ Additional Settings (Registration Type): Selector keys that define the behavior and nature of the contact, allowing you to mark whether the record is Active in the base and whether it has a Corporate nature (Legal Entity/CNPJ).
- 📞 Phone Link: The system is highly flexible and allows the insertion of up to 10 different phone numbers per contact. During registration, the operator has access to a complete international list of DDI (such as BR for Brazil, US for the United States, among others) to ensure proper formatting and validation of communication in Voice and Text media.
- 🧩 Custom Fields: Also known as "wildcard fields," these additional records can be dynamically created according to the specific needs of each organization, allowing personalized metadata to be attached to the customer’s profile.
Custom Field Registration

Contact Import via CSV
To perform bulk customer registration and optimize the operation’s loading time, the Omni platform provides the CSV file import routine. This feature can be accessed through the button located at the top right corner of the main interface.
Within the import screen, the system provides a standard file template for download, containing the exact headers and formats required to ensure error-free reading.
CSV Import Screen
Technical Guidelines for File Formatting
For the import engine to correctly process the records, the CSV file must strictly follow the following formatting criteria:
- 📑 Field Delimiter: The fields and columns of the file must be separated by semicolon (;).
- ⭐️ Mandatory Field: As in individual registration, only the Name column is mandatory for creating the record.
- 🚻 Gender Formatting: The
contact_genderfield is restricted and accepts exclusively the terms: Masculino, Feminino, or Não Informado (respecting capital initials). If preferred, the field may also be left blank. - 📱 Phone Number Standard: The registration of phone numbers must follow the complete international structure: DDI + DDD + PHONE NUMBER (example:
5548999999999), without masks, parentheses, spaces, or hyphens. - 🧩 Custom Fields Syntax: The import of personalized metadata (wildcard fields) has a specific formatting structure that must be built as follows:
- All custom fields of the record must be encapsulated between brackets
[]. - The field name and its respective value must each be enclosed in double quotes
"", separated by a comma. - If the contact has more than one custom field, use the pipe character
|to separate the brackets of each attribute.
- All custom fields of the record must be encapsulated between brackets
See the practical example of filling custom fields in the CSV cell:
["Faturamento","20.000"|"Advogado","Dr. Augusto Martins"|"Secretária","Gabriela Santos"]
Background Processing Flow
CSV file import is executed in the background by the Omni server. This architectural evolution ensures that the responsible operator does not get "stuck" on the screen waiting for the reading of large volumes of data to finish, allowing the user to normally navigate through other modules and screens of the system during processing.
⏳ Concurrency Lock: While an import is active and running in the background, the CSV upload button will be temporarily disabled (locked) for the user who initiated the action. A new trigger will only be allowed after the definitive completion of the current process.
Notification Center and Import Status
To help you track the progress of the load without losing visibility, Omni will send dynamic visual alerts directly on the screen through the notification center. If the database is very large, the system will send periodic notifications to update the status and display the overall percentage of processing progress.
At the end of the process, Omni will consolidate the result through a color code in the notification:
- 🟢 Green Notification (Absolute Success): Displayed when the spreadsheet is processed with 100% success, meaning all rows were inserted or updated without any rejection.
- 🔴 Red Notification (Critical Failure): Displayed when there is 100% error in file processing (usually caused by incorrect delimiter or missing mandatory columns). No record was persisted.
- 🟡 Yellow Notification (Status Updates and Partial Success):
- While the import process is running, the system sends periodic notifications showing the current status and real-time processing progress.
- This alert is also displayed definitively when the file completes the load with mixed success and failures (for example, some rows were saved, but others failed due to duplicate CNPJ or corrupted data), detailing the overall balance of completed and rejected records.
🛡️ Resilience Against Interruptions: If any network fluctuation or unexpected system interruption occurs, Omni will send a notification alerting about the incident, but the import engine will resume processing exactly from where it stopped. This way, you will not need to generate or import the file again from scratch.

Error Report Download
In scenarios where the import results in partial status (Yellow) or total failure (Red), Omni will automatically generate an audit file so you can understand the inconsistencies:
- 📥 Download Trigger: To download the error spreadsheet, simply click directly on the body of the alert notification generated on the screen.
- ⚠️ Important Notice on Volatility: Status notifications are volatile. If the user manually closes the notification or logs out before clicking it, the alerts will be permanently cleared, and it will no longer be possible to consult them or download the error report.
Identification and Update Intelligence
CSV contact import is not only used to insert new records but also to update the existing base automatically. The system has specific rules to identify duplicates and cross-check data.
Priority Rules in Identification
During file reading, the import engine attempts to determine if the contact already exists in the organization’s database using three key identifiers. The system strictly respects the following priority order:
- CPF: This is the sovereign identifier. If the CPF is filled in the CSV and already exists in the base, Omni will associate the data directly with this record, ignoring other checks.
- Phone: If the CSV line does not contain a CPF, the system will use the phone number to try to locate a corresponding record in the base.
- Email: In the complete absence of CPF and phone, the system will make a final attempt by locating the contact through the email address.
💡 Golden Rule: If none of these three identifiers find an exact match in the database, Omni will understand that this is a new customer and a new contact will be created automatically.
Data Update Rules
- ✏️ Selective Filling: Only the fields explicitly filled in the CSV will be used to update the located contact’s data.
- 🛡️ Data Preservation: Fields left blank in the CSV do not overwrite or delete existing information in Omni’s base. This ensures you don’t lose historical data by accident during a batch update.
Duplicate Contact Behavior
The impact of import varies directly according to your organization’s general security and governance settings:
- 🚫 Option "Do Not Allow Duplicate Registration" ENABLED: The system blocks the creation of homonyms. It will execute the ordered search (CPF → Phone → Email). If it finds the record, it updates the data; if not, it creates a new one.
- 🔓 Option "Do Not Allow Duplicate Registration" DISABLED: The system ignores any search for existing records. A new contact will always be generated in the base for each CSV line, even if the data is identical to an old record.
🔗 Additional Reference: To understand the impact and global prerequisites of these keys, consult the specific documentation of the functionality in the guide Do Not Allow Duplicate Registration.
Specific Restrictions for CNPJ
- 💼 Corporate Behavior: CNPJ is not used as a cross-check or update identifier in the batch import routine.
- ⚠️ Exception Handling: If during CSV processing the system identifies that a listed CNPJ is already linked to another existing contact in the base:
- The record of that specific line will not be persisted (saved) in the database.
- The overall import will continue executing but will return with a partial failure status.
- Omni will automatically generate an error CSV file for download, detailing the lines and reasons for CNPJ duplication so you can correct the data.
Importing Contacts with Carteirização Information
If your operational strategy requires contacts to already enter the Omni base linked to a specific portfolio and with predefined distribution rules, you can map these guidelines DIRECTLY through the CSV file columns. For the import engine to perform automated carteirização, the correct completion of the following technical fields is mandatory:
- 📂
portfolio: This field acts as the activation key for the feature. It must be filled in with the word true (in lowercase and without additional spaces). - 🔀
portfolio_type: Defines the rule and overflow flow of the portfolio if the primary agent is not available for service. This field must be filled exclusively with the number corresponding to the desired flow:- 1 - Recado Flow
- 2 - Backup Agent Flow
- 3 - General Queue Flow
- 4 - Follow-Me Flow
- 📧
portfolio_user_email: Enter in this field the institutional email address of the primary user/agent who will be the sovereign holder of this customer portfolio. - 🛠️
portfolio_service_name/portfolio_agent_reserve_email: Fields intended for service contingency. Depending on the flow chosen in the previous item, it must be filled with the exact name of the service to which the contact will be transferred or with the email of the secondary backup agent.

Contact Carteirização
The customer portfolio is one of the most valuable assets of any organization. It represents the grouping of contacts that have a history of relationship or active purchase potential with your brand. The more structured, qualified, and managed this resource is, the higher the conversion rates and retention performance of your sales and service team.
The Carteirização process consists of segmenting the company’s database and linking a responsible operator or salesperson to one or more specific customers, ensuring exclusive, personalized, and proactive service.
The Omni ecosystem has developed a comprehensive intelligent carteirização model, mapping all available media on the platform (Voice and Text). Thus, regardless of the channel chosen by the customer to interact, the system will know exactly who owns that portfolio and will apply automatic distribution and overflow rules.
Step-by-Step to Carteirizar a Contact
To manually assign one or more customers to a user’s portfolio through the graphical interface, follow the procedure below:
- Access the management screen and select the contact (or multiple contacts) you want to include in the portfolio.
- In the batch menu at the top, click the Assign button.
- In the window that opens, select the Carteirização Flow that best suits the strategy for that customer.
- Define which Agent/Operator will be the official holder and responsible for that portfolio.
- Click Assign again to confirm the operation. The system will display a floating message confirming the success of the carteirização.
⚠️ Mandatory Business Rule: For the carteirização link to be successfully processed and persisted by Omni, the selected contact must not have open interactions on the platform. If there is an active protocol, finalize the interaction before executing the assignment.
Distribution and Contingency Flows
When a carteirizado contact initiates an interaction with the organization, Omni will attempt to immediately direct the service to their exclusive user. However, if the portfolio owner agent is unavailable (paused, offline, or has reached the maximum concurrency limit), the system will automatically apply one of the contingency flows defined below:
- 📥 1. Recado Flow: If the portfolio owner agent is unavailable, the customer will be directed to a Voicemail (if the interaction is via Voice) or text messages will be retained in the agent’s panel for response upon return, preventing the contact from overflowing into the general queue.
- 👥 2. Backup Agent Flow: In the absence of the primary operator, Omni will immediately forward the interaction to the configured secondary backup agent. If the backup agent is also unavailable, the system will apply the Recado Flow as the last safety instance.
- ⏳ 3. General Queue Flow: If the owner is unavailable, the contact will be transferred to the service queue of the chosen rule. For Voice calls, the system will give the customer the option to wait in the queue; if they refuse, the call will be sent to the Recado Flow.
- ⚠️ Note for Email: For email interactions, ensure you choose only services that have properly registered and validated mailboxes in Omni.
- 📱 4. Follow-Me Flow: Exclusive for Voice interactions. In the absence of the agent, Omni will externally redirect the phone call directly to the operator’s registered mobile or landline number. For text media interactions, the system will follow the Recado Flow guidelines.
- 🔓 5. Unassign: This option immediately breaks the link, removing the existing carteirização and returning the contact to the organization’s general distribution base.
Data Anonymization
The Contact Anonymization feature in Omni was developed to strictly comply with the guidelines and requirements of the General Data Protection Law (LGPD). The purpose of this feature is to guarantee the holder’s right to be forgotten, fully and permanently encrypting all personal and sensitive data linked to the contact and their respective historical interactions.
⚠️ Maximum Security Warning: The anonymization process is absolutely irreversible. Once executed, the original data keys are destroyed, making it impossible to recover the information by any user, manager, or even Omni’s engineering team. Therefore, make sure you have the customer’s formal consent and explicit request before proceeding.
Operational Requirements and Prerequisites
For security and integrity reasons regarding the organization’s access profiles, the function is not enabled by default for all operators:
- 🔐 Profile Authorization: The user executing the action must be previously validated with anonymization permission.
- 🛡️ Execution Blockers: The system will automatically block anonymization if the contact has active pending interactions on the platform. It will not be possible to anonymize records with:
- Open interactions.
- Open satisfaction surveys.
- Open appointments.
📊 Failure Handling: If the action fails due to any of the impediments above, Omni will display an alert on the screen and provide the download of a CSV file containing a detailed report with the reasons for failure for each selected record.
Step-by-Step to Perform Anonymization
To execute the logical deletion and encryption of a customer’s data, follow the flow below:
- Access the Contacts management screen in the platform.
- Locate and select the checkbox of the contact (or multiple contacts) you want to anonymize.
- In the upper batch menu, click the Anonymize button.
- The system will display a pop-up warning window alerting about the irreversibility of the action. Read carefully and confirm your intention.
- Dual Security Authentication: To ensure the action is legitimate, Omni will require a new identity validation. Enter your login and standard user password in the indicated fields and click Anonymize.
- The panel will process the routine in the background and display an automatic message confirming the success or failure of the procedure.

Structural Impact: The Post-Anonymization Record
To ensure legal compliance without breaking your company’s statistical intelligence and management reports, Omni applies an advanced security algorithm:
- 🔑 SHA-256 Protocol: Encryption keys are generated at runtime through a hash using the SHA-256 protocol in a fully random manner. These hashes are stored inside an isolated bucket of indeterminate size, eliminating any possibility of reverse engineering.
- 🖥️ On the Contacts Screen: The customer’s record will automatically be changed to Inactive status, and all readable data (Name, CPF, Phone, Email, Address) will be replaced by an alphanumeric sequence encrypted by the hash.
- 📊 In Reports and Dashboards: The history of interactions and operational metrics (service time, tabulations, AHT) are kept intact for management statistical purposes. However, customer identification in these reports will display only masked and encrypted data, fully protecting the holder’s privacy.
Blacklist
The blacklist registration, i.e., the phone numbers that will be blocked for contacts, is carried out separately for Inbound and Outbound.
Blacklist Screen

The registration of phone numbers for the Blacklist can be carried out individually or via CSV import. In both cases, the phone format must follow the rules:
- Inbound
- DDD + phone number
- Outbound
- DDI + DDD + phone number
Individual Registration Screen

Import Screen
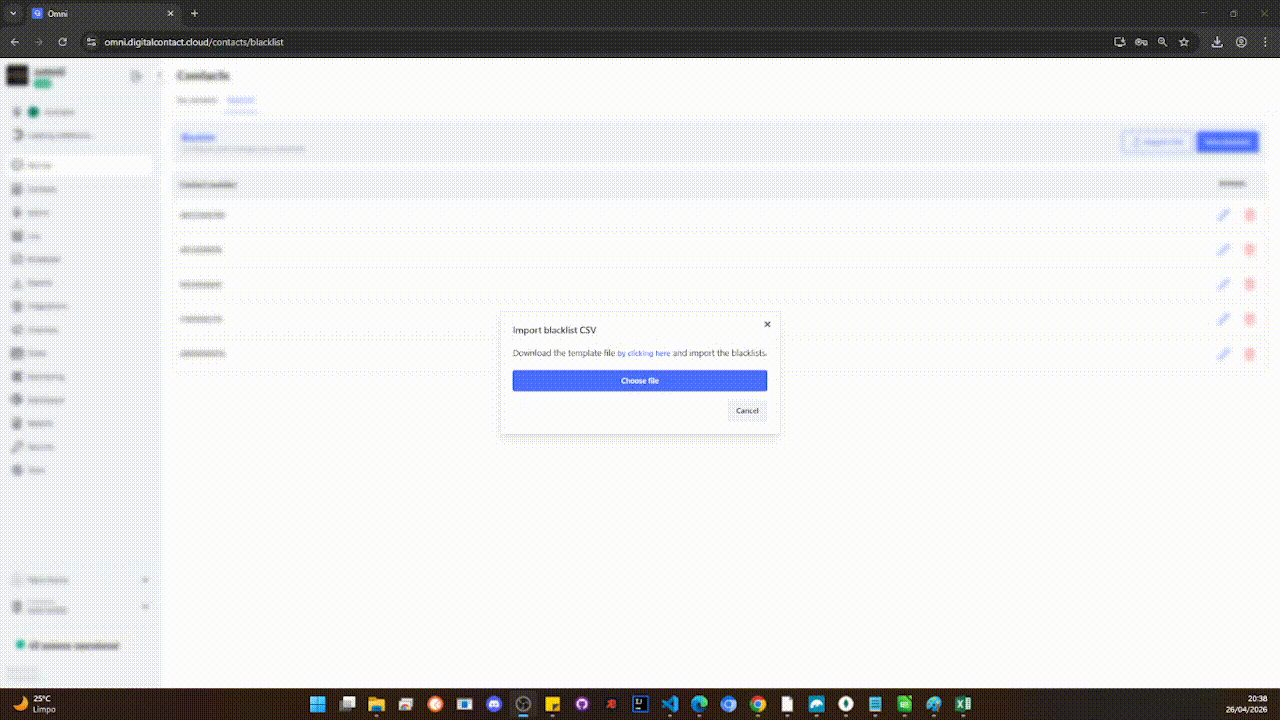
- To register the number or numbers, simply click Save on the individual registration screen or Import on the file import screen.
Merge Contacts
To keep the database clean, consistent, and free of duplicates, Omni provides the Contact Unification feature. This functionality allows the intelligent merging of duplicate records, consolidating the interaction history and metadata of the same customer into a single profile.
Business Rules for Grouping and Unification
Omni’s scanning engine uses three identifiers to track duplicates in the base: CPF, Email, and Phone. The system performs the search automatically and separates the records found into Unification Groups.
Since the scanning analyzes data individually, the same contact may appear in more than one group simultaneously if they share different identifiers with other records. This creates a cascading effect that allows Omni to unify a complete chain of duplicates.
Practical Example of Data Cross-Checking
Imagine a scenario where there are three scattered records in your organization’s database with the following information:
| Record in Base | Contact Name | Phone | CPF | |
|---|---|---|---|---|
| Contact A | Fernando Teste | 5511999999999 | fernando@omni.com | Not registered |
| Contact B | Fernando T. | 5511999999999 | Not registered | 123.456.789-00 |
| Contact C | F. Teste | Not registered | fernando@omni.com | Not registered |
From this data, Omni’s engine will generate the following grouping triggers:
| Identifier Used | Records Pulled into the Group |
|---|---|
📞 By Phone (5511999999999) | Groups Contact A and Contact B |
📄 By Email (fernando@omni.com) | Groups Contact A and Contact C |
💡 Result: Since Contact A serves as the “anchor” by being located in both the phone group and the email group, the system will identify that all three records belong to the same person. When executing the action, all three contacts will be merged into a single definitive profile.

Criteria for Defining the Primary Contact
When displaying the group to the operator, Omni needs to define which record will be the “main shell” (the registration that will inherit updates and keep active data). The criteria used by the system are:
-
🏆 By Last Interaction (Primary Rule): The contact with the most recent interaction recorded in the platform will be highlighted first in the interface and adopted as the primary profile for unification.
-
📅 By Creation Date: If none of the duplicate contacts in the group have any interaction history recorded in the system, Omni will use the chronological registration criterion. In this scenario, the last contact created in the database (the most recent record) will automatically be elected as the primary profile.
Execution Modes and Security Lock
To provide flexibility in database management, the supervisor has two ways to run the routine:
- 🥞 Unification by Individual Group: Allows analyzing and merging each group separately, reviewing the data on screen before consolidating.
- ⚡ Merge All (Mass): Processes the unification of all eligible groups in the organization simultaneously and in the background.
🚨 Dual Security Validation: Since this is a batch process that is completely definitive and irreversible, when selecting the option to merge all, Omni will require explicit confirmation. The user must type the text
**CONFIRMAR**(in uppercase and within the **) in the indicated field for the execution button to be enabled.

Since mass processing is executed in the background by the server, the supervisor can track the progress of the routine in real time through the Check Progress button, which will display a status bar as the unification advances.
⏳ Performance Note: Because unification is carried out meticulously contact by contact (ensuring the integrity of interaction histories), the total completion time of the routine will vary proportionally according to the total volume of records to be merged in the database.
Unification of Interaction History
One of the major advantages of intelligent merging is the preservation of your company’s operational memory. Omni does not discard past interactions from secondary profiles:
- 📚 Timeline Consolidation: At the end of the process, all interaction histories, protocols, and tabulations belonging to the merged contacts are automatically transferred to the timeline of the Primary Contact.
- 🖥️ Multi-Screen Visibility: This allows operators and supervisors to view, on any system query screen or report, the complete unified history of interactions, ensuring that no old service context is lost.
Status of Merged Records and Post-Unification Behavior
After the definitive completion of the merge process, Omni performs a structural change in the status of the records to ensure the service team does not trigger duplicate records:
- 🟢 Primary Profile: Maintained as Active in the database, centralizing all inherited information and metadata.
- 🔴 Secondary Profiles (Merged): Automatically marked by the system as Inactive.
🚨 Critical Warning on Irreversibility of History: Once unification is performed, the timeline transfer is permanent. If a supervisor decides to manually reactivate a secondary contact (e.g., Contact B) that was inactivated by the merge, this record will return to the base completely clean. Its previous interactions will not be restored, as they now definitively belong to the consolidated history of the Primary Contact (e.g., Contact A).
Impact on Contact Carteirização
The merging of records also directly interacts with the platform’s distribution rules and portfolio ownership. The system adopts the following security guideline:
- 🚫 Break of Secondary Link: If one of the contacts that underwent merging was previously carteirizado but did not meet the Primary Contact criterion (i.e., it was not the record that received the most recent interaction), that specific carteirização link will be automatically undone. The unified customer will respond only to the rules and the owner of the primary contact (if this one has an active portfolio).